Is 3D Printing Difficult?

Printing has become a necessity in the modern age and not a luxury. Most homes have a printer to quicken the effect and with there being billions of documents needing printing around the world, it is clear how the process of printing has become an essential part of our lives’ technological aspects. But these words only refer to “classical” 2D printing, i.e., printing two-dimensional images on different types of paper, although that is not the only existing manner of printing. Namely, along with 2D printing, the modern area has supplied us with 3D printing, i.e., the possibility of printing different three-dimensional objects for everyday use. This type of printing has been growing in usage recently and has found application in a lot of fields, including medicine, education, and others. Because of its growing importance and popularity, we’ve decided to give you an insight into 3D printing so you know what to expect. The main concern you might have is how difficult 3D printing is, especially for beginners.
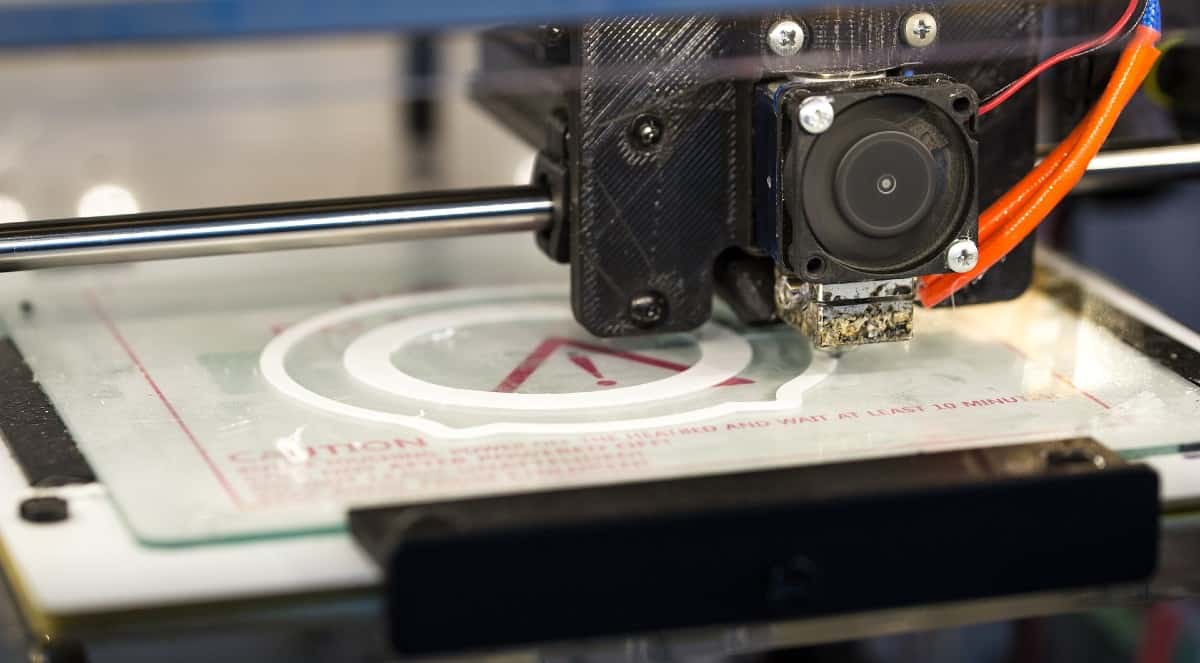
3D printing is generally quite hard to master if you are a complete beginner. In order to be able to print 3D models, you will have to have some modeling skills, as well as be able to use the corresponding software. On top of that, you need to be familiar with the technical aspect of 3D printers.
As you are probably a beginner, and what to introduce yourself with 3D printing, below we will walk you through how difficult it is exactly, and what are the main obstacles you will have to overcome and learn if you want to start with 3D printing.
What Is 3D Printing?
3D printing, or, as it is alternatively called, additive manufacturing, is the construction of a three-dimensional object from a predesigned model or a digital 3D model. The term “3D printing” can be used to refer to a wide variety of processes in which material is joined or solidified under computer control to create a three-dimensional object, with the material being added together (such as liquid molecules or powder grains being fused together), typically layer by layer, but it is mostly used to describe the construction of digital 3D models for home practical use.
In the 1990s, 3D printing techniques were considered suitable only for the production of functional or aesthetic prototypes, and a more appropriate term for it at the time was rapid prototyping; this term is now largely outdated. Namely, as of 2019, the precision, repeatability, and material range of 3D printing have increased to the point that some 3D printing processes are considered viable as an industrial-production technology, whereby the term additive manufacturing can be used synonymously with 3D printing. One of the key advantages of 3D printing is the ability to produce very complex shapes or geometries that would be otherwise impossible to construct by hand, including hollow parts or parts with internal truss structures to reduce weight. Fused deposition modeling, or FDM, is the most common 3D printing process in use as of 2018.
As far as the materials used are concerned, traditionally, 3D printing is focused on using polymers for printing, due to their ease of manufacturing and handling. However, the method has rapidly evolved to not only print various polymers but also metals and ceramics, making 3D printing a versatile option for manufacturing.
The Three Phases of 3D Printing
Before we answer some of the burning practical questions you might have, we shall present to you how the process of 3D printing generally works. The three phases – modeling, printing, and finishing – are going to be briefly presented so that you know the mechanism behind the whole process:
1. Modelling
The first phase of 3D printing is the modeling, where you design the model you want to be printed. These 3D printable models may be created with a computer-aided design (CAD) package, via a 3D scanner, or by a plain digital camera and photogrammetry software.
3D printed models created with CAD result in relatively fewer errors than other methods because they are digitally created and thus more precision. Errors in 3D printable models can be identified and corrected before printing.
The manual modeling process of preparing geometric data for 3D computer graphics is similar to plastic arts such as sculpting. 3D scanning is a process of collecting digital data on the shape and appearance of a real object, creating a digital model based on it.
CAD models can be saved in the stereolithography file format (STL), a de facto CAD file format for additive manufacturing that stores data based on triangulations of the surface of CAD models. STL is not tailored for additive manufacturing because it generates large file sizes of a topology optimized parts and lattice structures due to the large number of surfaces involved.
A newer CAD file format, the Additive Manufacturing File Format (AMF) was introduced in 2011 to solve this problem. It stores information using curved triangulations.
2. Printing
Before printing a 3D model from an STL file, it must first be examined for errors. Most CAD applications produce errors in output STL files, most commonly holes face normals, self-intersections, noise shells, and manifold errors. A step in the STL generation known as “repair” fixes such problems in the original model.
Generally, STLs that have been produced from a model obtained through 3D scanning often have more of these errors as 3D scanning is often achieved by point to point acquisition/mapping. 3D reconstruction often includes errors.
Once completed, the STL file needs to be processed by a specific piece of software called a “slicer,” which converts the model into a series of thin layers and produces a G-code file containing instructions tailored to a specific type of 3D printer (FDM printers). This G-code file can then be printed with 3D printing client software (which loads the G-code and uses it to instruct the 3D printer during the 3D printing process).
Printer resolution describes layer thickness and X–Y resolution in dots per inch (dpi) or micrometers (µm). Typical layer thickness is around 100 μm (250 DPI), although some machines can print layers as thin as 16 μm (1,600 DPI). X–Y resolution is comparable to that of laser printers.
The particles (3D dots) are around 50 to 100 μm (510 to 250 DPI) in diameter. For that printer resolution, specifying a mesh resolution of 0.01–0.03 mm and a chord length ≤ 0.016 mm generate an optimal STL output file for a given model input file. Specifying higher resolution results in larger files without an increase in print quality.
3. Finishing
This is the last phase in 3D printing and the simplest one. After making your model and actually printing it, there’s not much to go before you can show your model to your friends and family. Though the printer-produced resolution is sufficient for many applications, greater accuracy can be achieved by printing a slightly oversized version of the desired object in standard resolution and then removing material using a higher-resolution subtractive process.
The layered structure of all additive manufacturing processes leads inevitably to a stair-stepping effect on part surfaces that are curved or tilted in respect to the building platform. The effects strongly depend on the orientation of a part surface inside the building process. Some printable polymers such as ABS, allow the surface finish to be smoothed and improved using chemical vapor processes based on acetone or similar solvents.
Some additive manufacturing techniques are capable of using multiple materials in the course of constructing parts. These techniques are able to print in multiple colors and color combinations simultaneously, and would not necessarily require painting. Some printing techniques require internal supports to be built for overhanging features during construction. These supports must be mechanically removed or dissolved upon completion of the print.
All of the commercialized metal 3D printers involve cutting the metal component off the metal substrate after deposition. A new process for the GMAW 3D printing allows for substrate surface modifications to remove aluminum or steel.
Is 3D Printing Difficult?
Now that you’ve seen the mechanism behind the process, you might be wondering whether it’s difficult to take a hold of all of these steps and learn how to use a 3D printer? Well, we have to be honest with you – it is. It is nothing unsurmountable and you’ll eventually get the hang of it, but for a beginner, 3D printing genuinely is difficult. Let us see why that is.
There are two main reasons. The first is of a more theoretical nature and concerns your knowledge of modeling and whatnot. Namely, the process of designing a precise and good 3D model is not easy and you’ll have to be very precise and very meticulous to reach a level where the final product will be something you’re satisfied with.
It might look easy and the software can help you in a big way, but you’ll certainly need both skill and willpower to design a complex model you intend to print. This is – by far – not an easy task and you may make several mistakes along the way, and we’re not referring to the classical errors that come with the modeling procedure (see above). We’re talking about actual mistakes that might render your model unusable, unstable, or just faulty and you certainly don’t want that to happen.
The second reason concerns the technical aspects of the 3D printer itself. Namely, the 3D printer is a very delicate machine and you’ll have to keep watch during the whole printing process. A seemingly small and insignificant part might break or fall out of place and you’ll get, well… nothing.
Your printer will keep working, but it won’t actually print anything because a part is faulty and it’s preventing it from fully fulfilling its task. They can be compared to old Xerox machines, which means that – generally – they require several people to operate normally and there is always the risk of an error and even a fire hazard, which is not something you’d expect, right?
Well, it’s exactly like that. Due to the nature of the device itself, 3D printers are very fragile and rarely work without requiring some tuning and supervision. It takes time to grasp all these details, so it’s definitely not easy for a beginner to do so. Luckily, the technology keeps getting more sophisticated, which means that it’s also becoming more reliable.
So, as you can see – 3D printers are not easy to deal with. They require a wider set of knowledge and expertise than regular printers and are still relatively faulty compared to similar devices. A beginner will surely face a lot of issues when dealing with a 3D printer, but – luckily enough – you’ll be able to learn the procedure in time and you’ll be able to work it normally in no time.
An estimated time frame would be a couple of months, perhaps – some weeks before you learn the basics and about a month of time before you grasp everything – so be prepared to learn.
How Long Is the Process of 3D Printing?
The process of 3D printing is not nearly as quick as regular, 2D printing. There is no general time frame, as the duration of the procedure depends on the complexity of the model, the materials used, the aesthetic details, and the quantity of the printed models.
In that aspect, it can last anywhere from 30 minutes to more than a week, if you’re printing something large and complex. Still, there are some rules that can help you with roughly determining the duration of your printing and we are going to present those rules, i.e., the elements they refer to, in the following paragraphs:
1. Size
The size of your model has a large role in determining the time of the printing. This is somewhat logical, as larger models take more time, which is expected; this aspect is the same as in 2D printing – more complex images take longer to print than plain text.
But, when it comes to 3D printing, there are three elements of the size that can help you know what to expect. The first is volume and the rules are very simple – the larger the model, the more time it will take. Smaller models can be printed in several minutes, but larger models may take up more than a couple hundred hours to print.
The second element is the footprint of the model; the larger the footprint, the more time it takes for the needle to reach all the ends, which means that models with larger footprints take more time to print (unless they are really, really small). The last element is the height, which is also very logical – the shorter the model, the faster you’ll finish with it.
2. Geometry
This aspect actually refers to the shape of the model. Namely, if you’re just printing a simple cube, you probably won’t have to wait very long. The cube is a very simple object, it has a precise shape and the printer will actually execute repetitive movements to print it. But, on the other hand, if you have a complex shape and a model with lots of specific details, the printer will certainly take longer to print it than a simple, geometrical shape.
3. Technology
As we’ve talked about, there are several different printing technologies available and the speed of printing will depend on the technology. When it comes to this element, it all comes down to the configuration of the printer head, i.e., whether it’s a paintbrush or a paint roller; the latter is faster than the former.
4. Layer Height
We’ve already explained how the height of the model determines the time needed for printing, but another thing to keep in mind is the height of all the layers on the model. The higher the layer, the more time you’ll need to print the model.
5. Quantity
This one is pretty simple, don’t you think? The more models you have for printing, the more time it will take. This element doesn’t really require any explanation.
Once all of this done, you’ll enter the post-printing phase, where you’ll have to finish your product and finally be able to show it to the people around you.
This covers our analysis of the topic for today. For more information, keep following us and stay tuned for more of the same.


